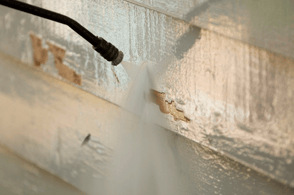
 It’s easier than ever to pressure wash the surfaces around your home. Pressure washing equipment can be purchased or rented easily, and homeowners are increasingly eager for DIY projects. It’s still important to plan your project, research the right equipment for the job, and take the time to understand the machinery before going to work on your house. Our tips will help you get started!
Tip 1: Choose the right equipment.
Your equipment should have the right capabilities for your specific pressure washing project.
-
Make sure the machine will dispense an appropriate volume of cleaning chemicals, and not just water. It may sometimes be possible to lighten or remove some of the mildew or grime using only pressurized water, but for an optimal and much longer lasting clean, and to address most stains, you’ll want to use a mixture of water and the right cleaning solution.
-
Assess your machine’s pressure capabilities before renting or buying. Pressure is measured in psi (pounds per square inch), and typical pressure levels for pressure washing range from a few hundred psi all the way up to several thousand. It’s tempting to assume you’ll use the highest level of pressure to blast away stains, but instead, look for a machine that can accommodate varying pressure levels. You’ll want to adjust the pressure depending on the type of surface you’re cleaning.
-
Perhaps more important than your machine’s pressure capabilities are its volume capabilities. A machine that produces a rate of 1 GPM (gallon per minute) cleans much less effectively and much more slowly than a machine that produces 4 GPM, for example.
-
Decide which type of tip or nozzle is best for your project. There are four major tip sizes, each of which is best for different surfaces and materials. The number on the tip refers to the degrees at which it splays or fans the water flow. For example, a 0-degree tip will produce a pencil-thin, intense flow, and might be used for getting rid of especially stubborn stains in concrete. A 15-degree tip might be used to strip paint or remove grime and debris from various hard surfaces. A 25-degree tip might be used to flush dirt, grime, and leaves from sidewalks and pavers, or from metal furniture or fencing. A 40-degree tip might be used for cleaning wood, vinyl, or aluminum siding. Additionally, a chemical injector tip would be used to apply any type of cleaning solution that you choose to run through your equipment, and a rotary tip would be used to spray the water in a circular motion.
Tip 2: Learn how to operate your equipment.
Safety:
-
First and foremost, consult your machine’s manual. High water pressure can cause severe damage to your property, and severe injury to yourself or others.
-
Before activating the machine, make sure the tip is directed away from windows and even more importantly away from people and pets.
-
Remember to begin your project using the lowest pressure, and work up to higher pressures, as needed. Many types of material can shatter if too much pressure is used, at risk to you.
-
Wear protective coverings. Most pressure washing professionals and DIYers alike choose to wear boots and gloves, and even eye and ear protection. It’s also recommended to wear rain slickers or other outer garments that can protect you from getting excessively wet during the project.
Effectiveness:
-
Avoid spraying windows and screens. Even low pressure can shatter glass and warp screens.
-
When applying cleaning chemicals, move from the ground up, and thoroughly rinse them by moving from the top down. Do not let the chemicals dry, or even dwell longer than they should on any surface. Rinse multiple times, if necessary.
-
Before attacking the entire surface, find an inconspicuous area to test your pressure and technique. The more hidden the test area the better, in case you need to adjust the pressure.
-
Begin your work close to the house, and move outward, using a sweeping motion. Overlap or oversweep each area slightly so that no lines are visible.
Tip 3: Do the prep work.
The plants and grass around your home are easily damaged without proper precaution, so take the time to prepare the area for your project. Thoroughly wet all plants before, during, and after the pressure washing. This will dilute the chemicals and keep them from sticking to your plants and causing damage to them. Likewise, move any vehicles and cover any outdoor furniture that might be in the way in order to protect them from the powerful stream and chemicals.
Tip 4: Know your limits.
Know the limits of your machine. Dirt, grime, and mildew are generally easy to remove, but certain stains, especially deep set stains or rust, fertilizer, or motor oil stains, will be tough to remove, and if you’re not careful, you could do more damage than good. Likewise, know your own limits. Pressure washing can be a wet, frustrating, time-consuming task. If you need to move around heavy ladders, or walk along slick surfaces, including rooftops, the project can become more taxing and downright dangerous. There’s a reason most homeowners prefer to call a good professional pressure washing company to do the work for them! If that sounds like the right solution to you, find the best professional pressure washers in town and leave the job to them.
