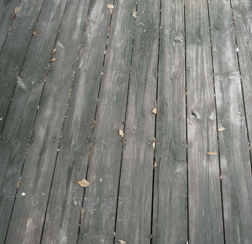
Pressure washing is the perfect way to get hard surfaces really clean. A combination of the right water pressure, good technique, and an effective cleaning solution will remove even the worst and deepest set stains from the wooden boards of your deck, dock, boardwalk, and siding. Too much power or the wrong technique, however, can severely damage or even ruin the wood surfaces around your home. In some cases, damage can be fixed by sanding the boards, but in other cases, boards or planks may need to be replaced or even rebuilt. Avoid these horror stories by learning how to pressure wash your wood surfaces the right way!
Step 1: Select the right pressure.
Pressure is measured in psi (pounds per square inch), and typical pressure levels for power washing range from a few hundred psi all the way up to a few thousand. It’s tempting to just opt for the highest level of pressure available, but high pressure can etch into brick and cement surfaces, and will totally destroy softer wood surfaces.
-
A safe range to use on your pressure washer is between 500-700 psi.
-
Begin with 500 psi and work up from there, testing each increment on a small and inconspicuous board.
-
When pressure washing soft wood such as cedar and pine, use between 500-600 psi; for harder wood, you can safely use a slightly higher psi, but do not go above 1200 psi for any type of wood.
Step 2: Select the right tip.
-
Use a fan tip. This will splay the jet, making the spray even but dispersed. Note: Do not use a rotating tip on wood surfaces.
-
Fan tip size is measured in degrees, with 40-60 degrees being the standard size. We recommend using a 60-80 degree fan tip, which will provide more water flow but with lower pressure.
Step 3: Select the right technique.
-
Find an inconspicuous area to test your pressure and technique. The more hidden the test area the better, in case you need to adjust the pressure. Test on a small piece of wood, rather than a large or central plank, in case you have to replace the piece.
-
Before pulling on the trigger, make sure the tip is directed away from windows and even more importantly away from people and pets. The spray from a pressure washing nozzle will shatter windows, dent vinyl siding, and is extraordinarily harmful to skin.
-
Aim the tip at the wood surface, no closer than 18-24 inches from the wood, and slowly pull on the trigger. Lower the wand tip to about 12 inches from the surface, and begin moving it in a sweeping motion. Note: Never get closer than 12 inches from the wood unless you are using extremely low pressure.
-
As you make your sweeping motion, keep a consistent distance between the wand tip and the wood surface.
-
Begin your work close to the house, and move outward.
-
Create your sweeping motion to go with the grain of the wood, lengthwise with the boards.
-
Overlap or oversweep each area slightly so that no lines are visible.
-
Be aware that pressure washing can raise wood fibers slightly from the board, even with very low pressure. When you are finished pressure washing, spot sand any raised wood fibers in order to prevent splinters. Note: If you are going to restain or reseal the deck, sand the entire area after it has been pressure washed.
Pressure washing leaves the hard surfaces around your home clean and looking great. DIY enthusiasts might enjoy pressure washing challenges, and even beginners can get great results after doing some research and following good tips. Pressure washing wood surfaces can be tricky, though, and some homeowners prefer to find the best local pressure washing service to take care of the job. If you live in Northeast Florida, First Coast Home Pros has the team for the job!
